
After a year of development, I’m incredibly excited to share the progress of my upcoming game with everyone!
Cloudburst Connection explores the life of a System Operator (Sysop) running a dial-up Bulletin Board System (BBS). Set your time circuits to the 80s, pop in your favorite new wave cassette, and get your modem running! Set in the neon-illuminated city of Cloudburst, you’ll be tasked with creating your dream BBS, building relationships with your users, and exploring other bulletin boards across the telephone network. Will you choose to grow your board into a major commercial success, or provide a free place for the community to enjoy the latest ANSI artwork? Or perhaps enter the underground world of hacking and phone phreaking? Cloudburst Connection is all about making connections – connections to computers, connections with people, and connections in conversations. Creating your BBS is only part of the fun – interactions with your users control the kind of Sysop you want to be. Build friendships and rivalries, make difficult decisions, and explore storylines through email, forum posts, and attending offline events. Experience online life before the Internet with Cloudburst Connection!
In addition to the single-player game, Cloudburst Connection features a multiplayer mode where you become a real Sysop! Not only can other players connect to your BBS, but you can program and share your own Python text-based games and applications. Now the only thing limiting your perfect BBS is your own imagination!
On a personal note, this project is very special to me and something I’ve wanted to do for a long time. A lot of my teenage life was spent calling and running bulletin boards. I made a lot of friends, learned a lot about programming, and had a lot of fun in a world that has now virtually disappeared in the wake of the Internet. Most folks out there have never heard of a BBS, and I wanted to create an accessible and fun way to share that world with them. For those lucky enough to have spent time on a BBS, I hope this game will bring back some good memories. More information will be coming soon (along with percent complete for each task), but here are some screenshots and an overview of where we currently are in development!

Single-player mode goals:
- Create your perfect BBS, install games for your users, host files to download, provide services such as email and message forums
- Visit other BBSes, discover secret networks, advertise your BBS, even hack your adversaries if you so choose
- Grow the functionality of your BBS by crafting new features and services. Discover new recipes from text files and other online resources
- Upgrade phone lines, modems, and hardware to allow more users to call your BBS
- Build relationships with your users by responding to emails and message forum posts, as well as attending events with them offline
- Fill your scrapbook of memories with photos and stories from meetups with your users
- Calling other boards depletes focus, gain focus by sleeping
- Purchasing files and other resources cost money, gain money by working a day job, selling files, or charging for BBS access
- Explore different storylines to their conclusion with different game endings
Multi-player mode goals:
- Allow real players to access your BBS through Steam
- Create, host, and share BBS games created in Python. Features documented API for interacting with virtual computer from your script.
(Mostly) Finished:
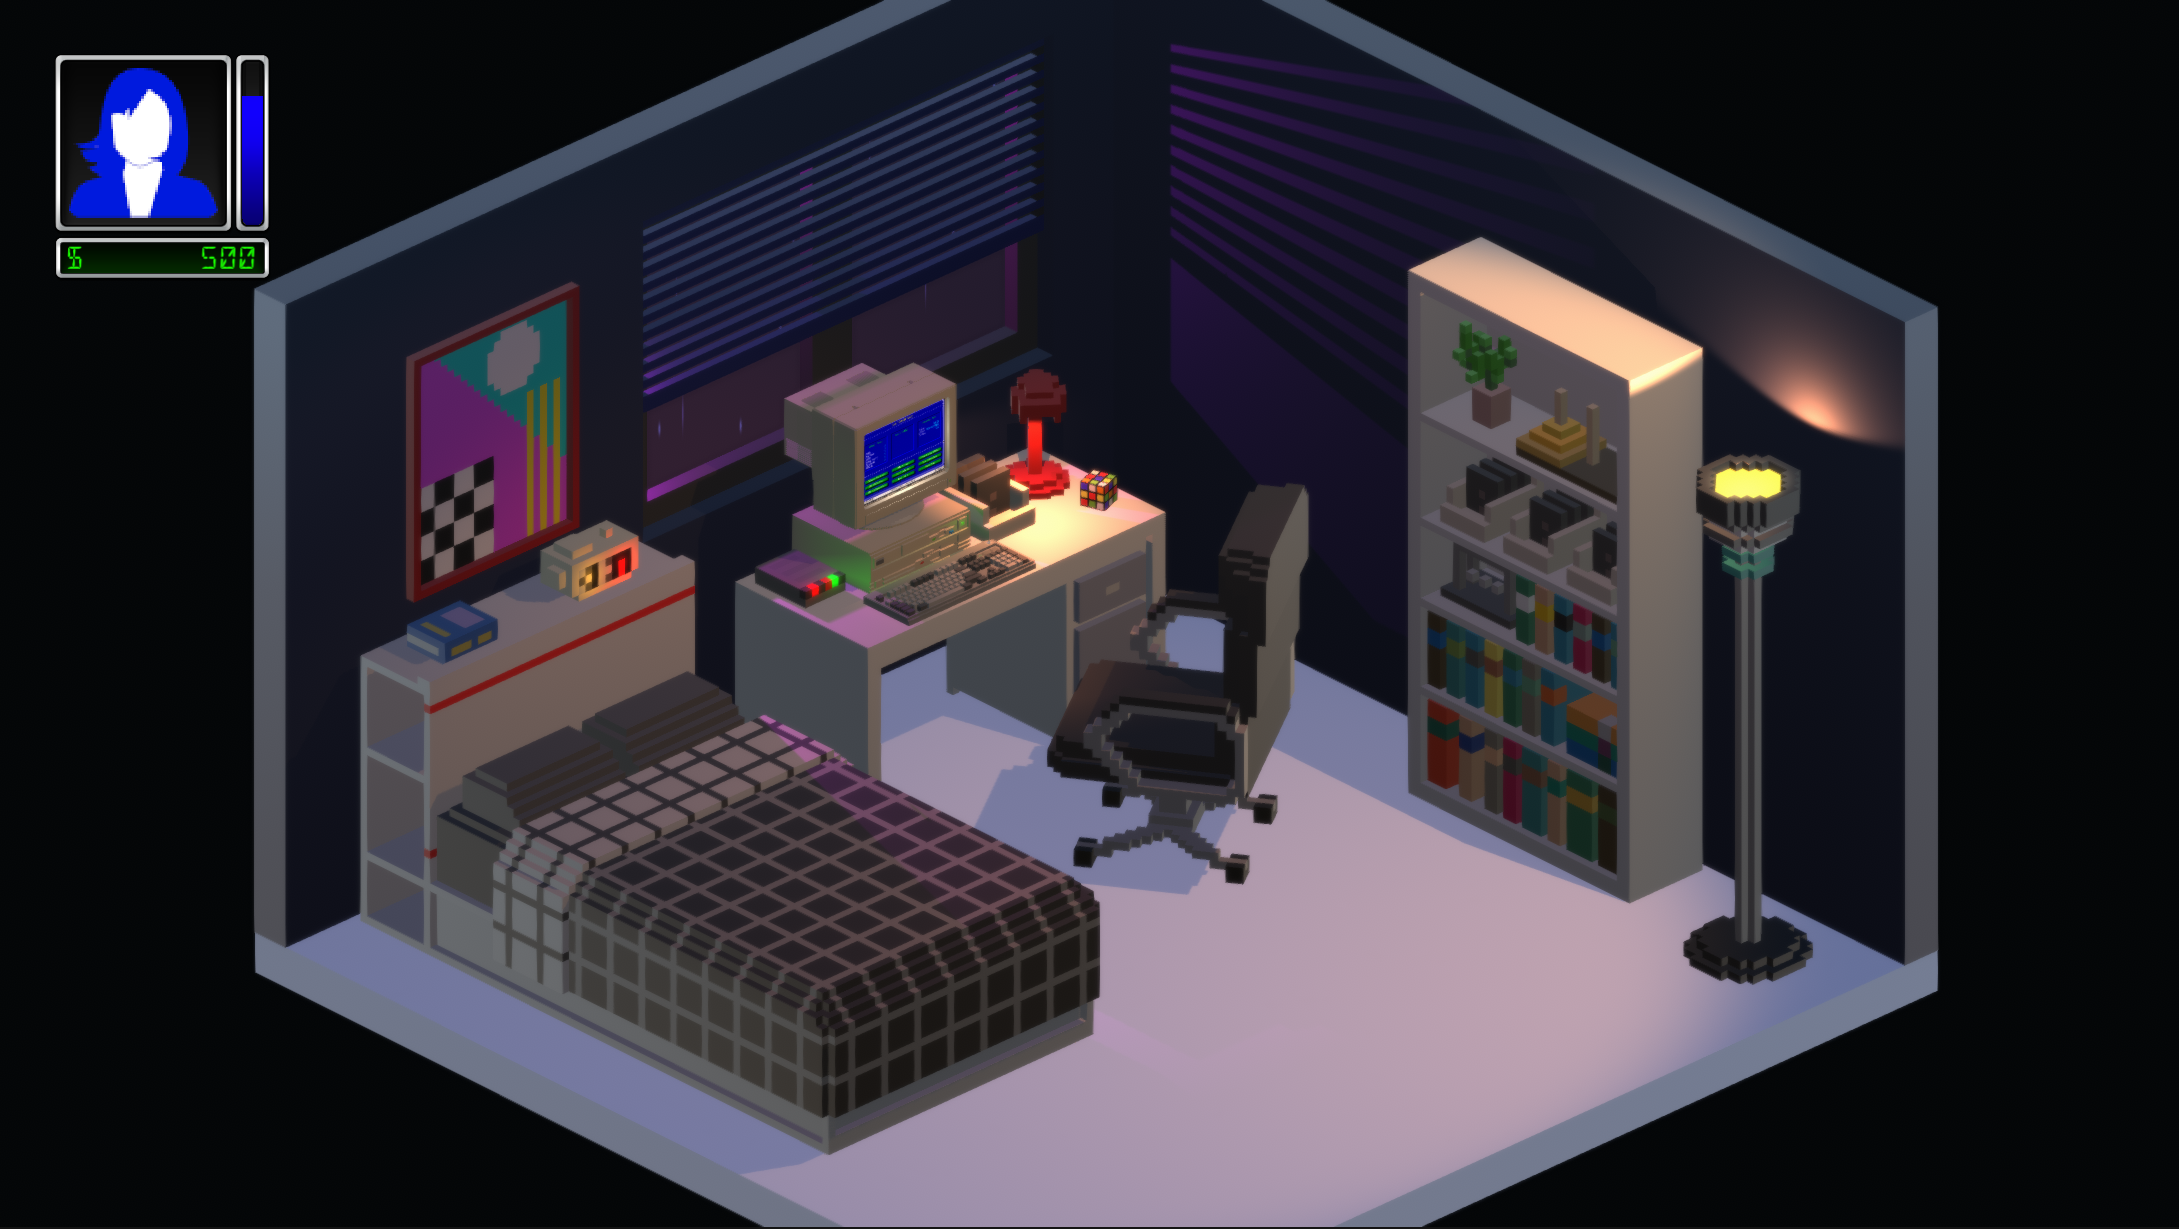
- Voxel style 3D environment
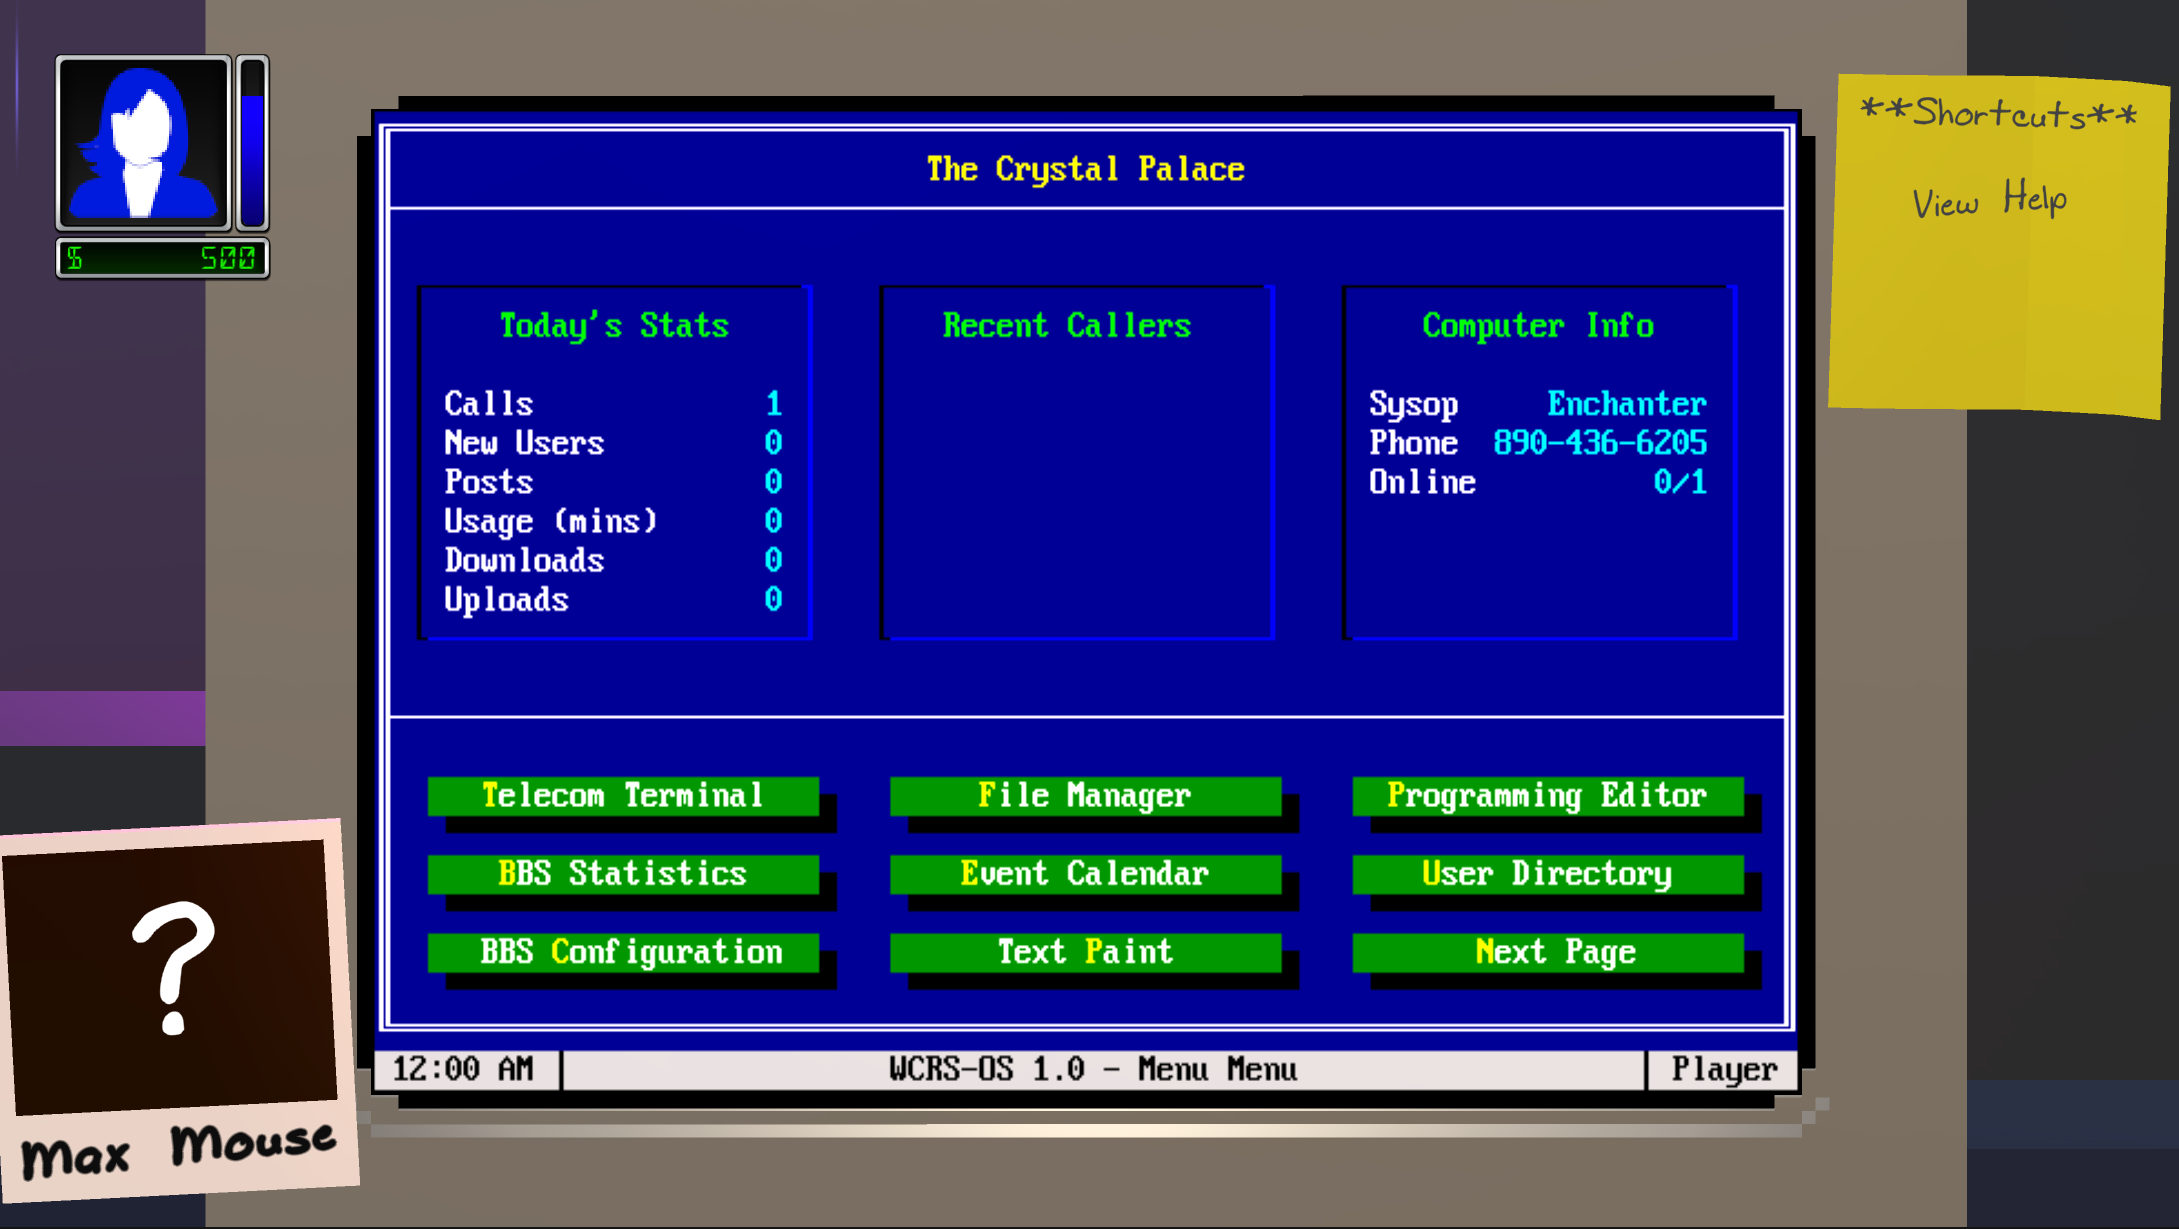
- Virtual computer and hardware, including text mode VGA (ASCII/ANSI graphics), PC speaker, modem, etc
- Full multithreaded operating system, virtual file system, and extensive API
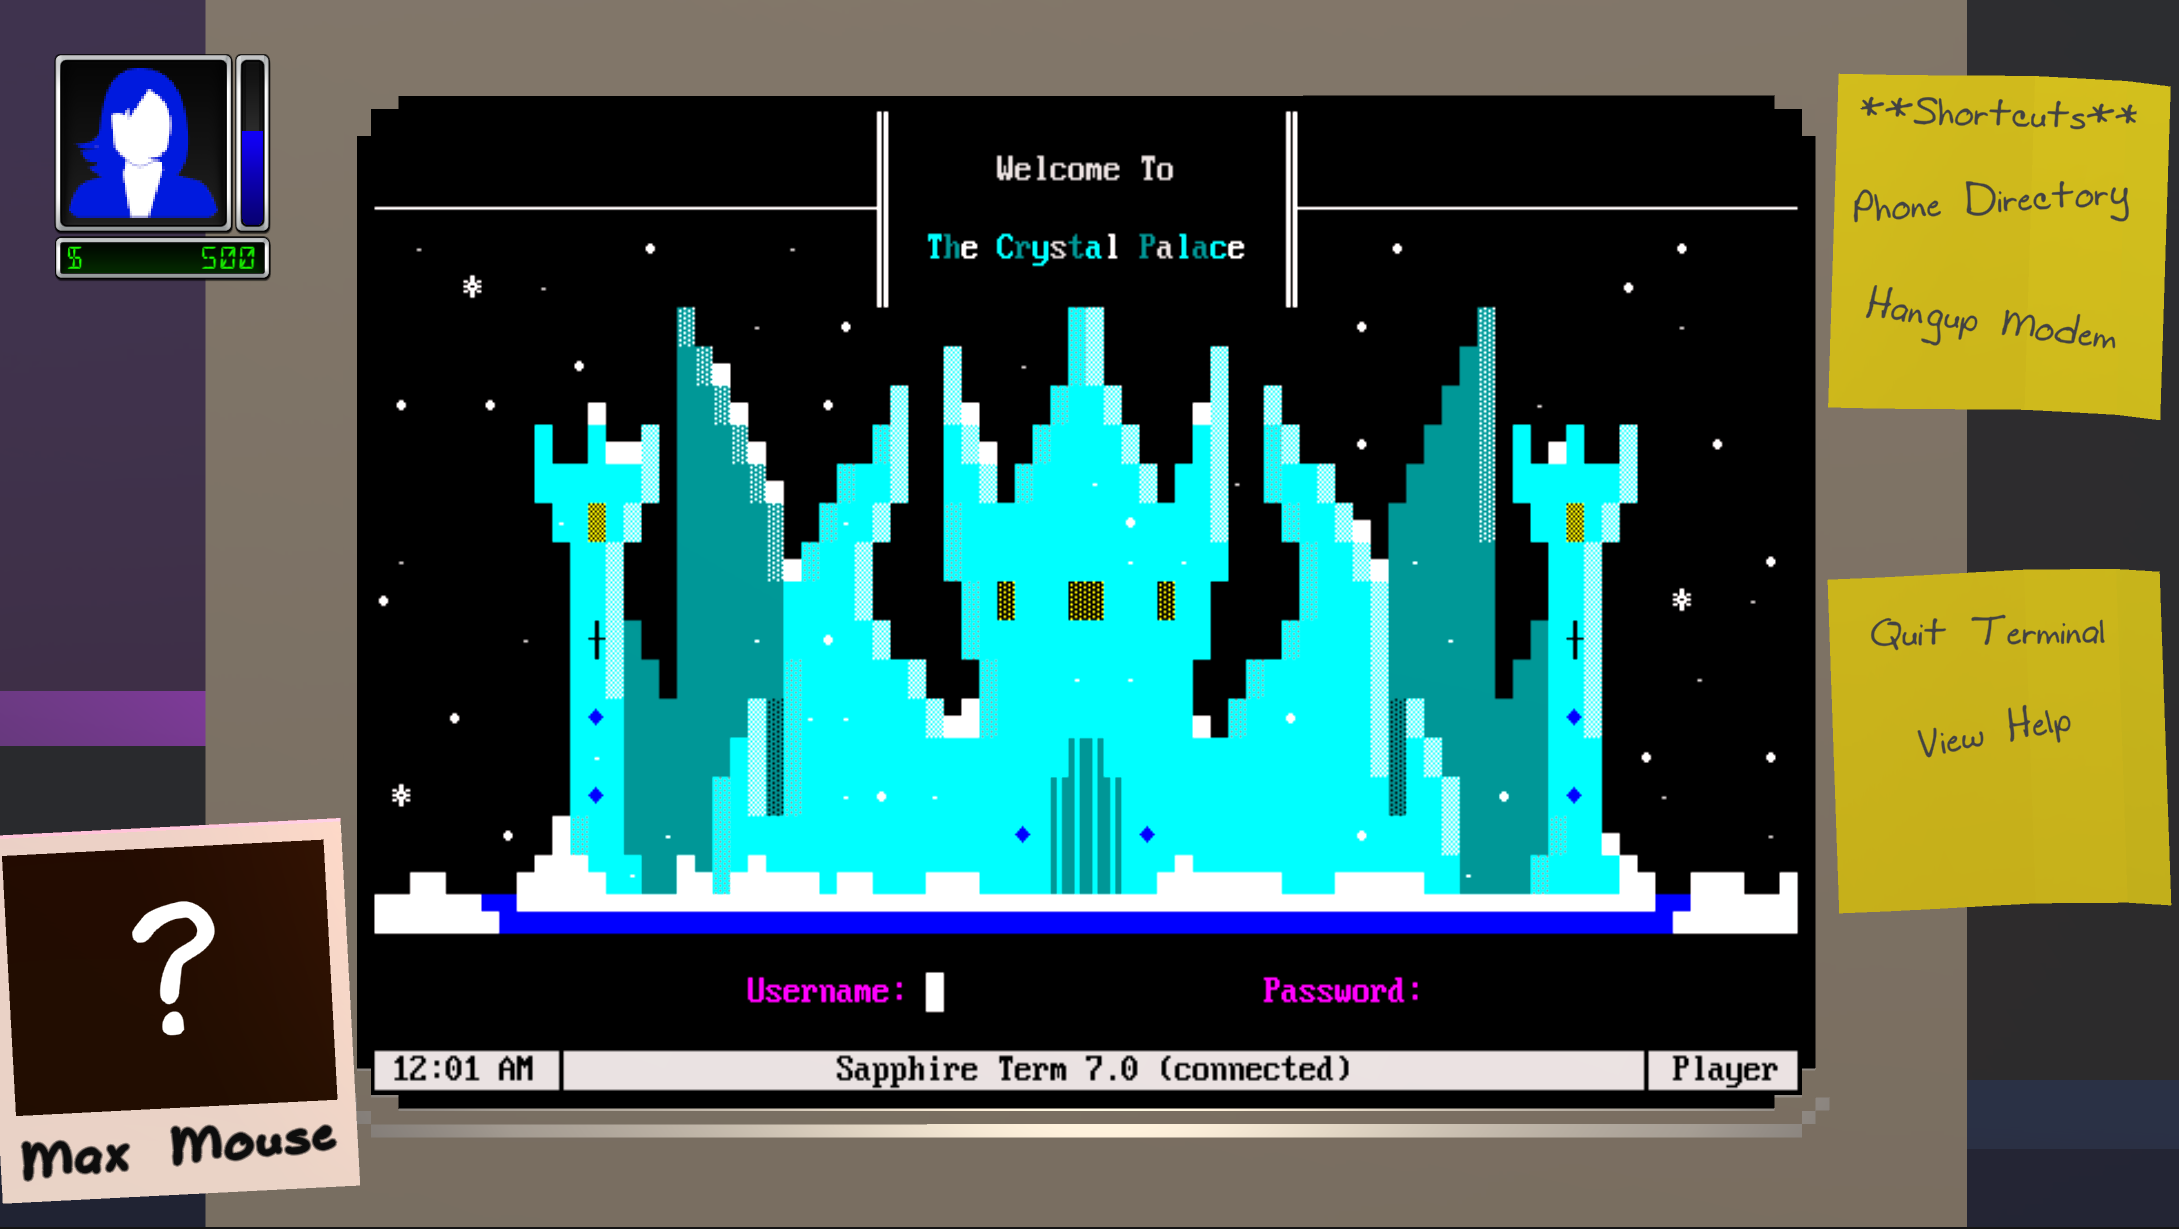
- Virtual public telephone network
- BBS configuration for setting menu options and marking which files (resources) are available for NPCs to purchase & download
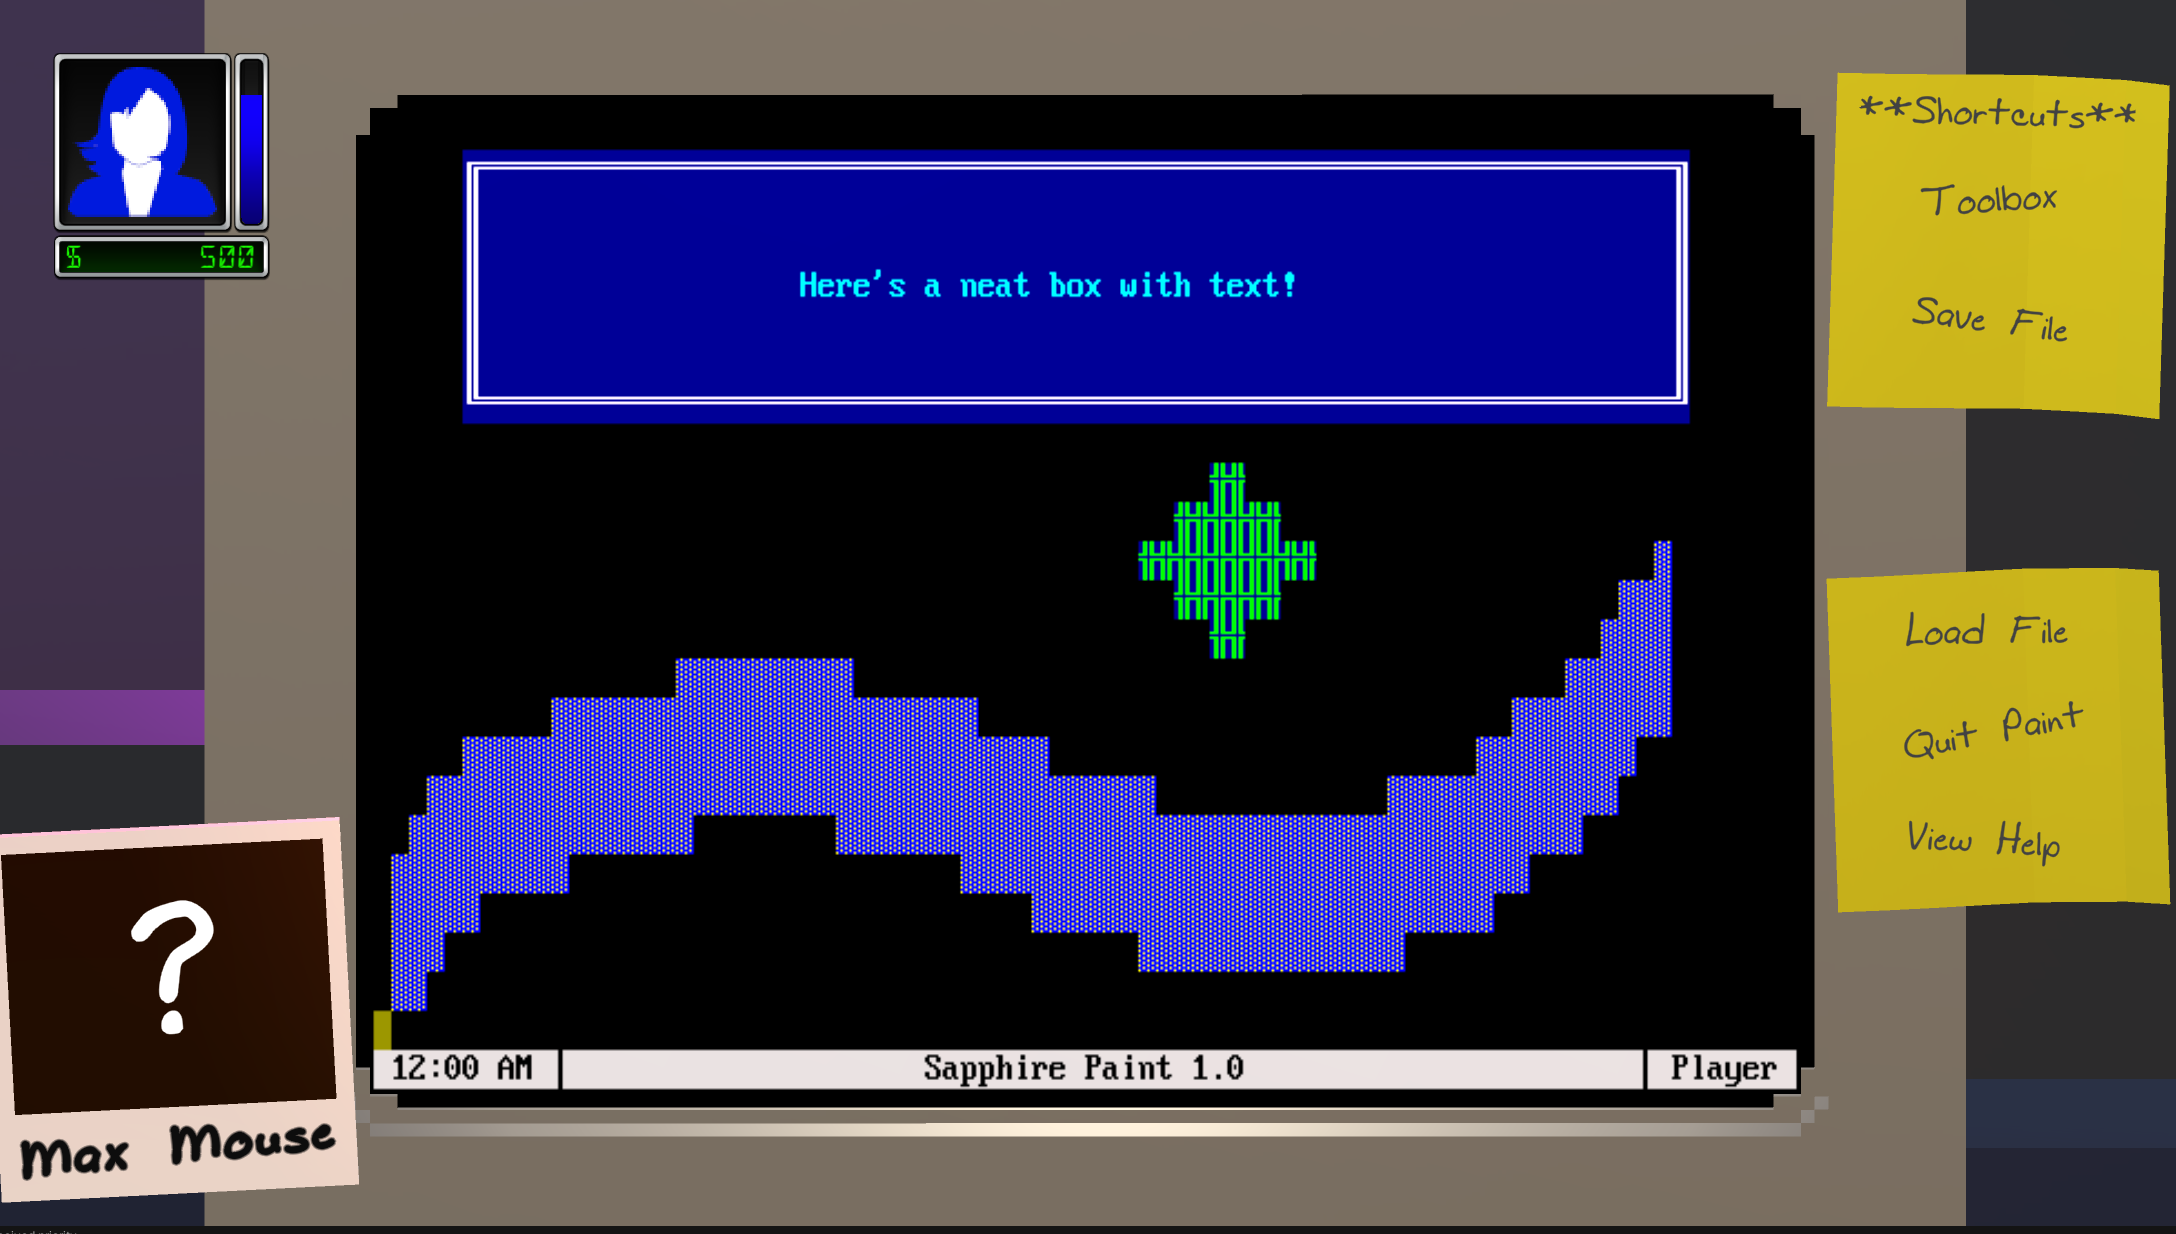
- ANSI paint program for drawing text menus, screens, and artwork
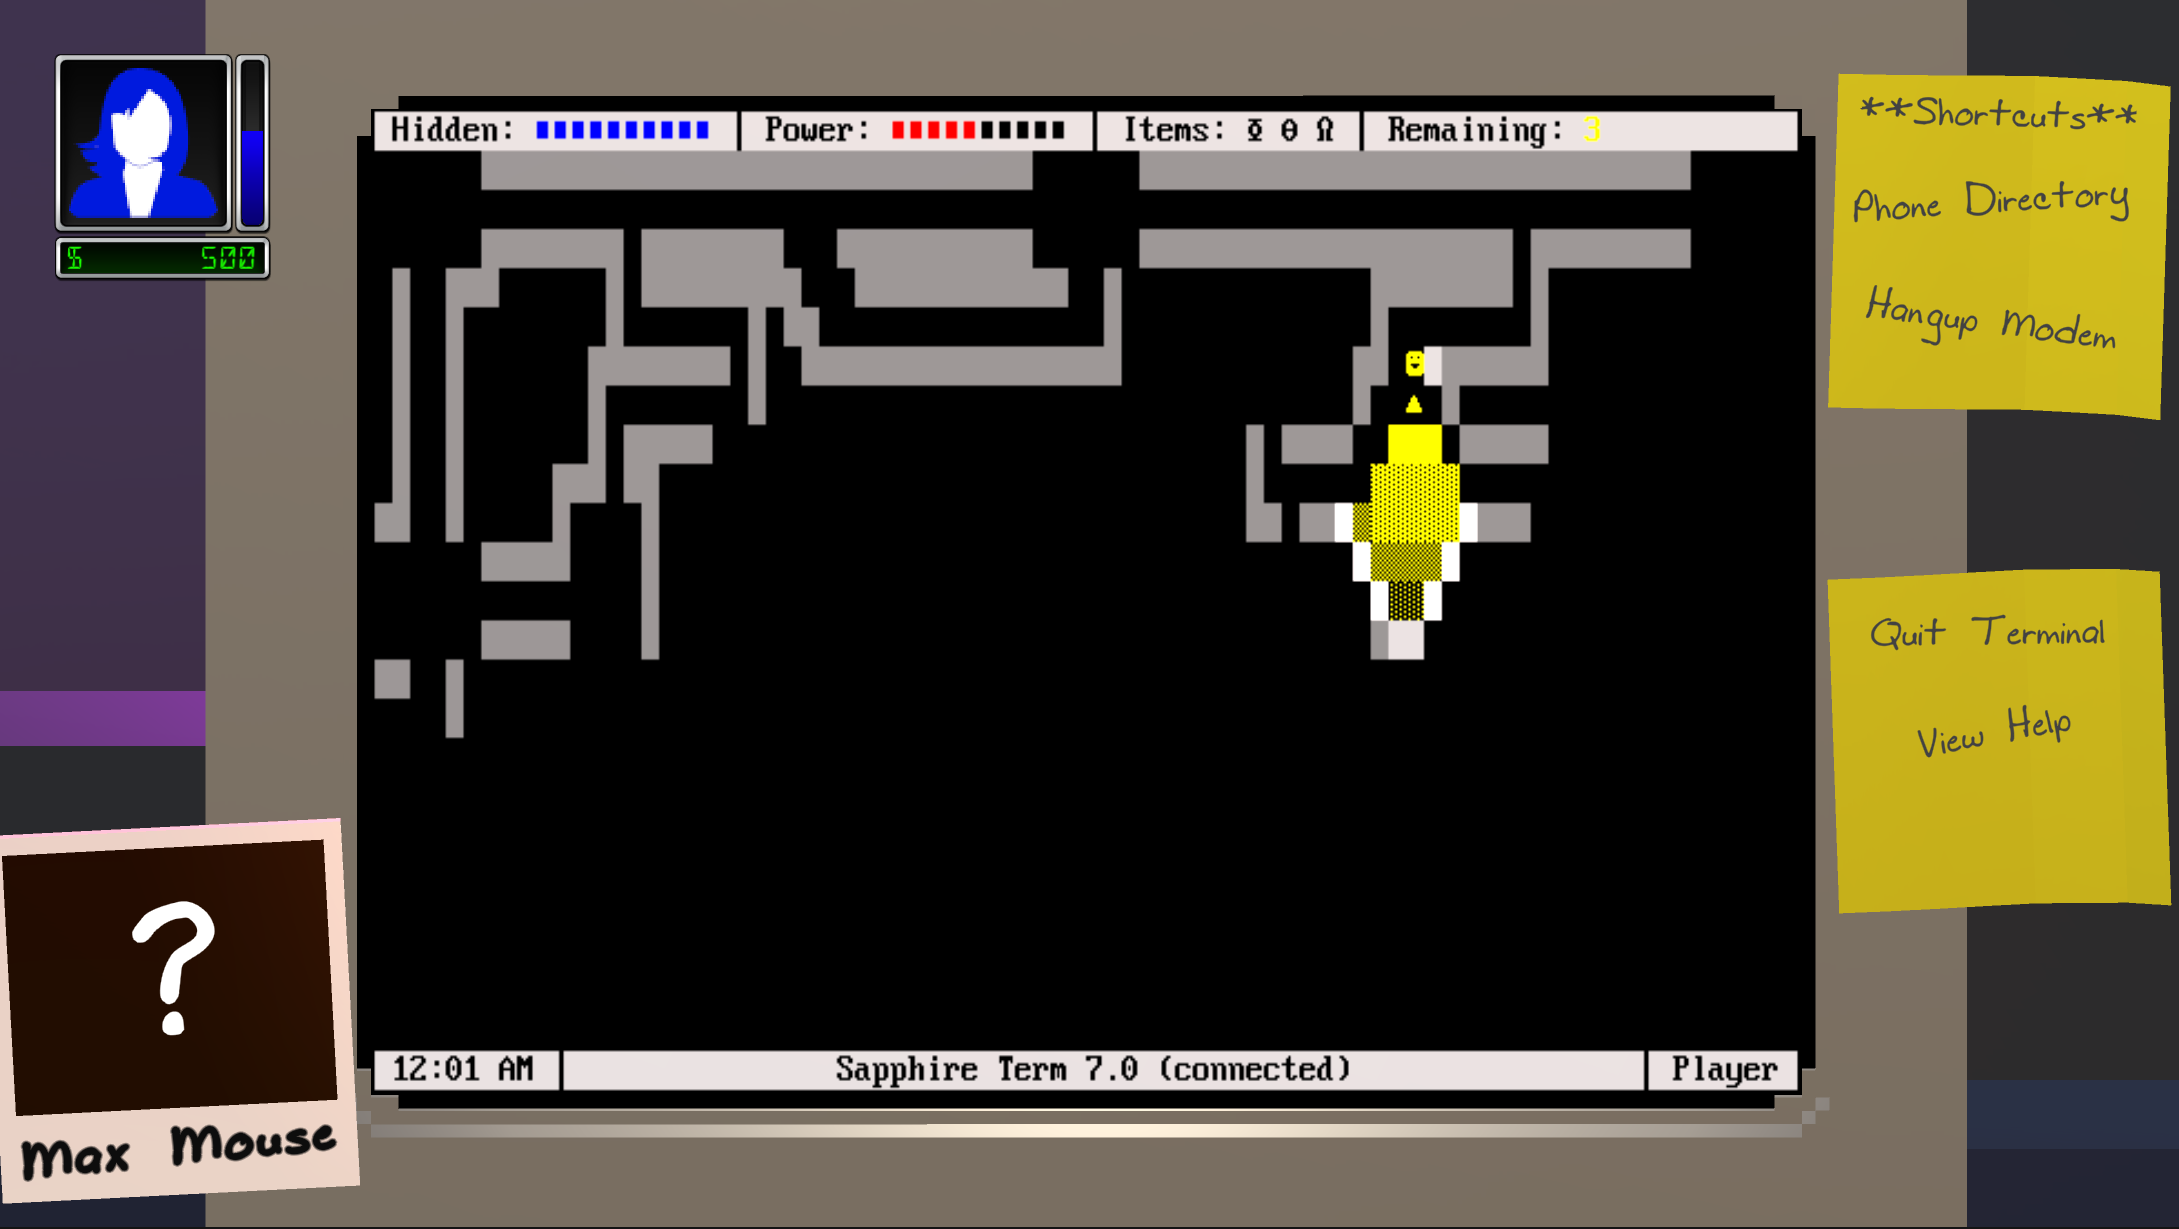
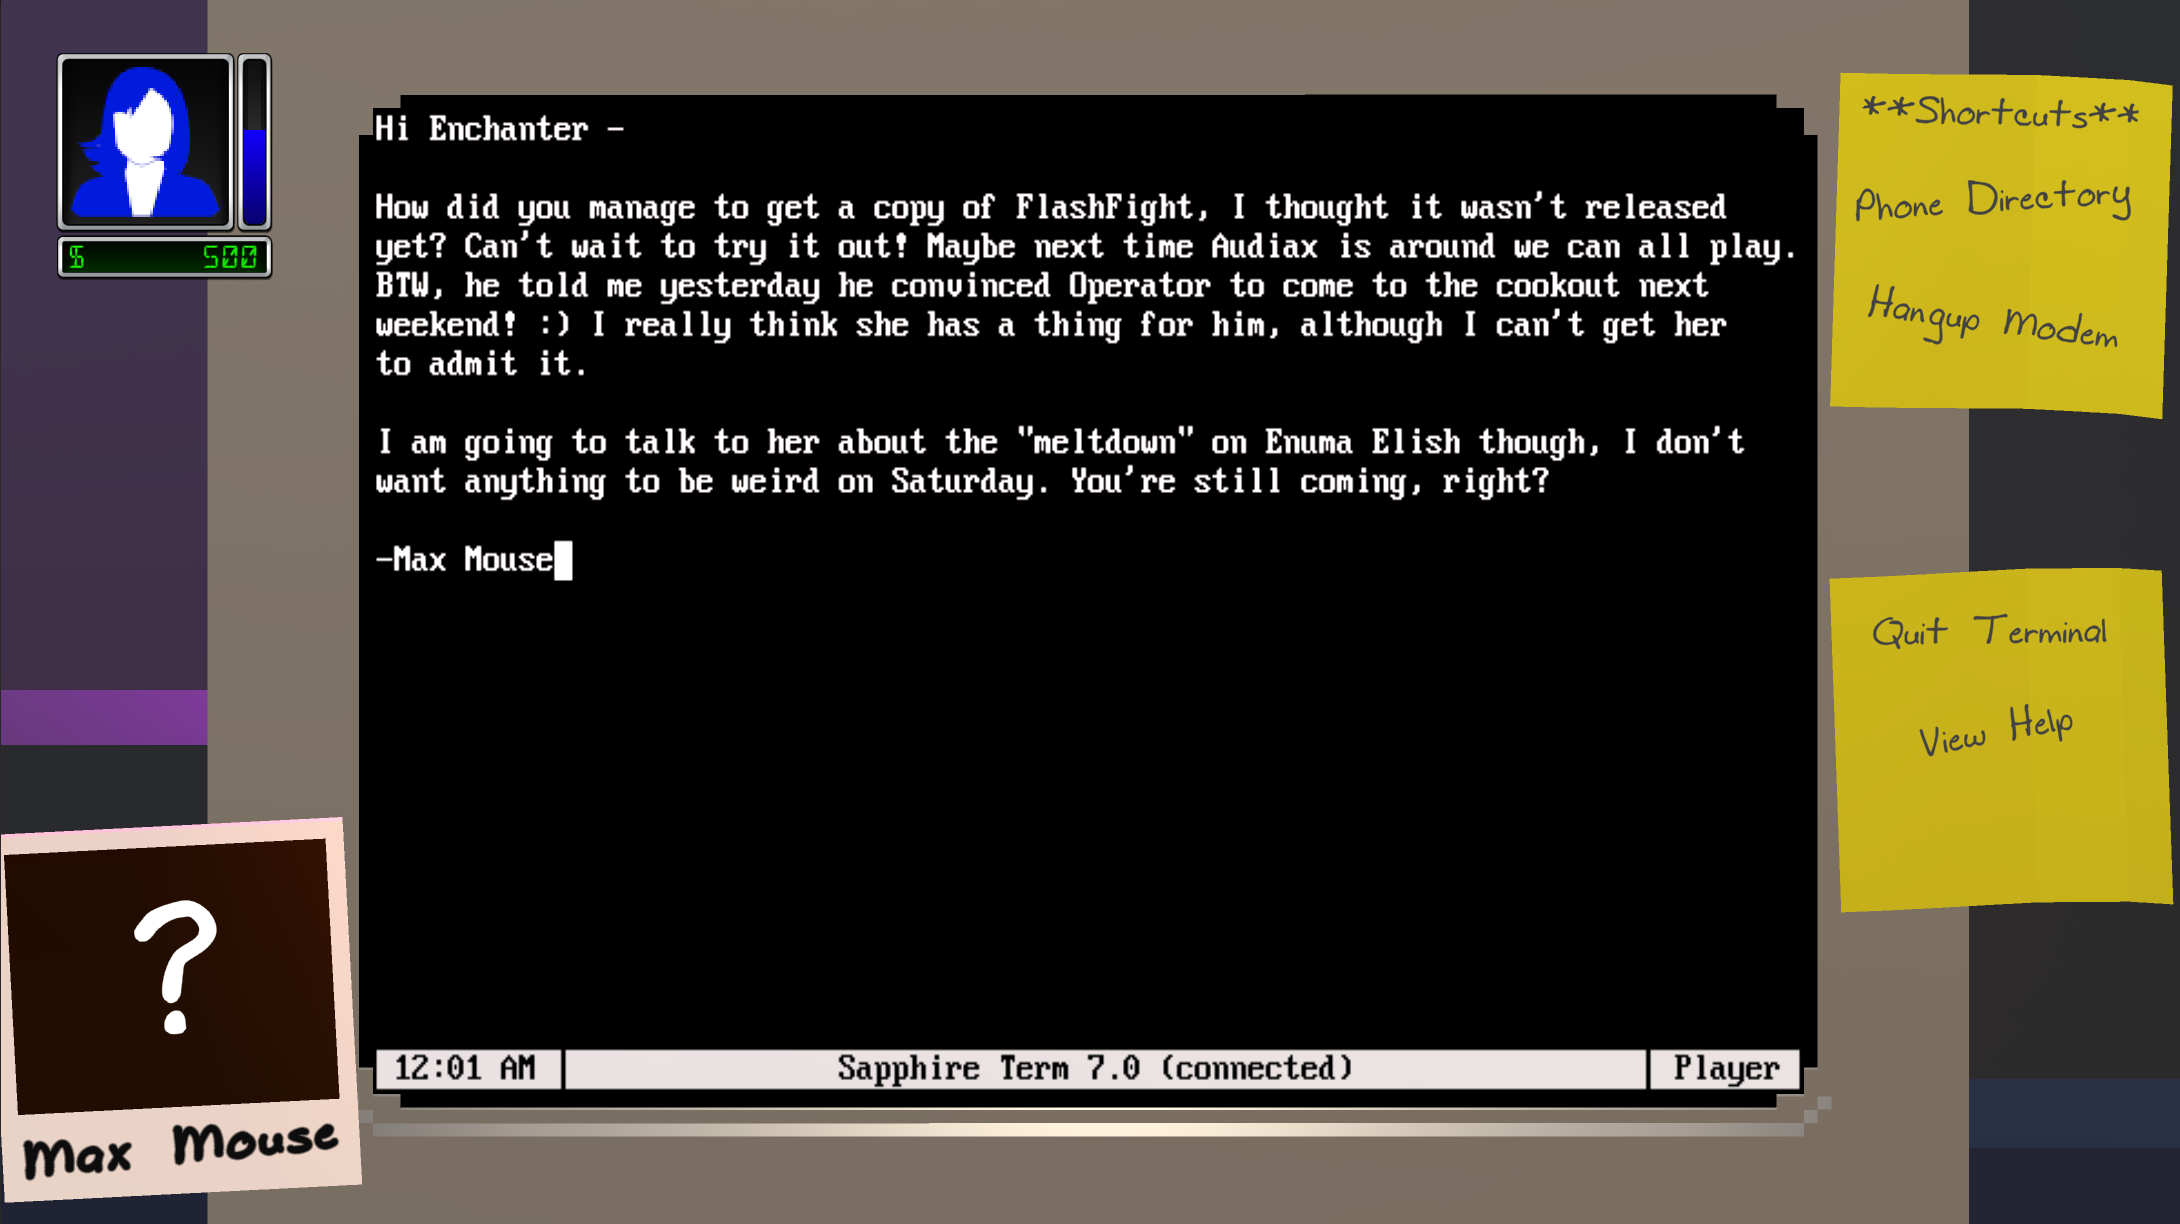
- Terminal program for dialing other BBSes (NPC and player)
- BBS modules: File downloads, email
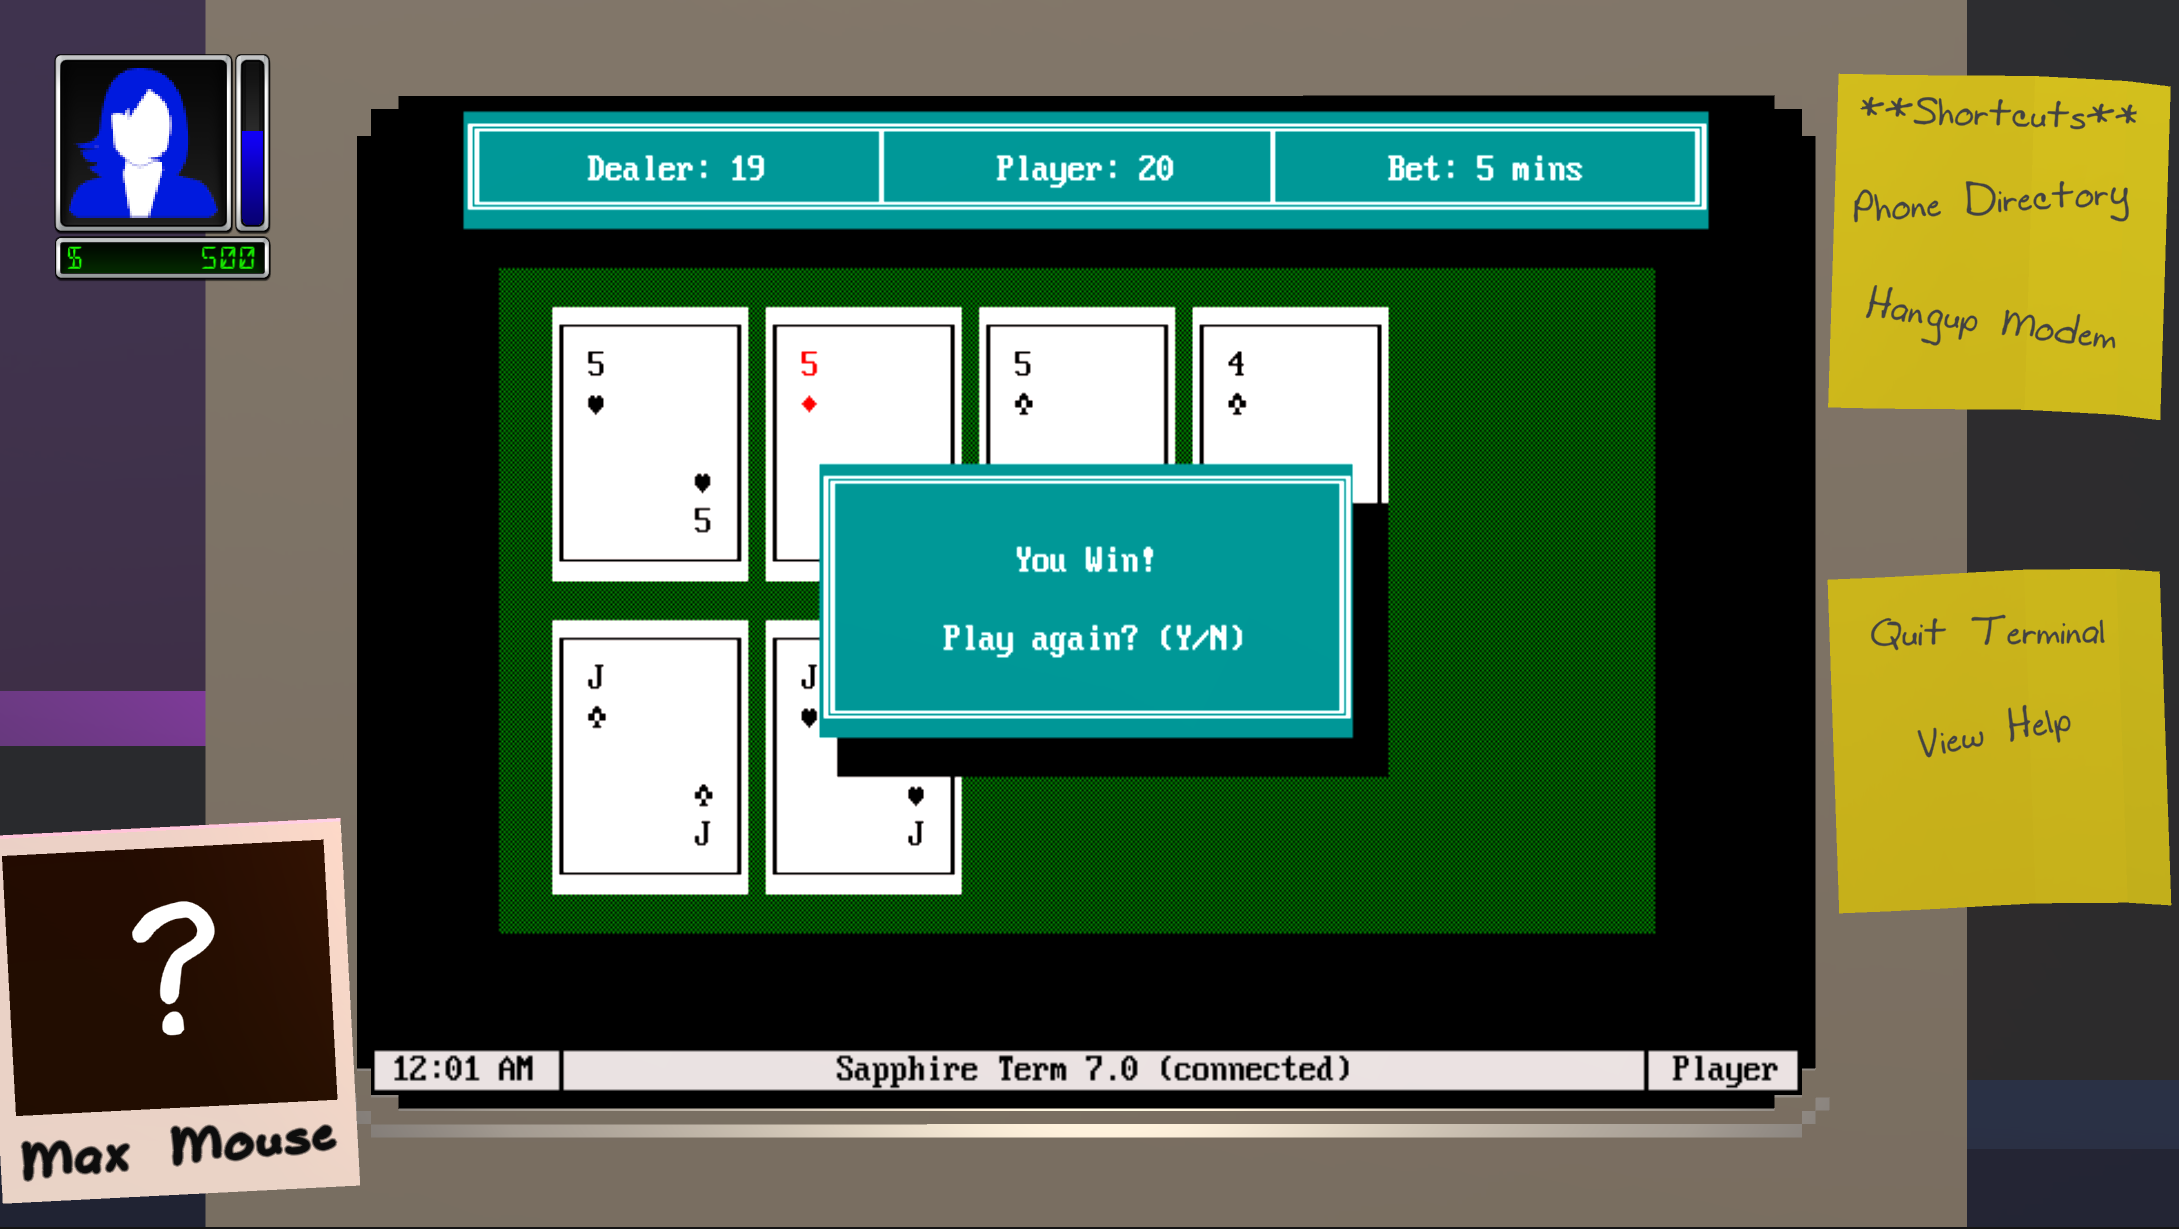
- BBS games: Blackjack (single player), FlashFight (multiplayer)
- Multiplayer: Python interoperability for running player-created scripts on virtual computer
Todo:
- Crafting system – players can craft new BBS features in the single-player mode by combining downloaded files using the “Programming Editor”
- BBS module: File Manager – players can view/manage files (resources) they download here
- BBS module: Module – BBS statistics – players can review how well their BBS is doing here
- BBS module: Event calendar – players can schedule and review upcoming meetings with NPCs here
- BBS module: User directory – players can view the list of their NPC users here
- Photo and scrapbook – photo attached to screen will update depending on NPCs the player is interacting with. The scrapbook will show pictures and text of events associated with NPCs
- AI – NPCs will call the player’s and each others’ BBSes, write messages, play games, download files, etc
- Dialog trees and events – the game will have an extensive amount of possible choices for conversations with NPCs
- Assets – decorate your in-game room with lots of different furniture, art, knickknacks and collectibles
More info soon!


